This is default featured slide 1 title

Go to Blogger edit html and find these sentences.Now replace these sentences with your own descriptions.

This is default featured slide 2 title

Go to Blogger edit html and find these sentences.Now replace these sentences with your own descriptions.

This is default featured slide 3 title

Go to Blogger edit html and find these sentences.Now replace these sentences with your own descriptions.

This is default featured slide 4 title

Go to Blogger edit html and find these sentences.Now replace these sentences with your own descriptions.

This is default featured slide 5 title

Go to Blogger edit html and find these sentences.Now replace these sentences with your own descriptions.

Saturday 6 August 2011

Solved - Download failed.: Could not create Temporary file

Solved - Download failed.: Could not create Temporary file


Ok, trying to do an automatic upgrade from 2.7 to 2.7.1 and after logging in it says:

"Downloading update from http://wordpress.org/wordpress-*.*.*.zip

Download failed.: Could not create Temporary file

Installation Failed"


Solution:

1>

if you have my own dedicated server with just one site. It can get tiresome changing folders permissions from 755 to 777. After doing some research I noticed that Apache is running with php safe mode "On"

Once i changed it to Off i was able to install/update plugins with the wp-content folder having a 755 permission.

I know that having Safe mode off is a security issue but being that i have my own server and only me as the only user i don't have a problem with it.


2> ISP won't allow it. Is there a way to designate a temp directory where additional permissions may be granted to facilitate this process?

I found two fixes which involve adding a line to the wp-config.php file. I added both and the plugins update fine now. I need to try it on one of my installations to see if WordPress itself will auto update. Here are the lines to be added to the config file:

define('WP_TEMP_DIR', ini_get('upload_tmp_dir'));
putenv('TMPDIR=' . ini_get('upload_tmp_dir'));

It should not be this difficult to figure out WordPress. Please add a variable that we can fill in the settings. Then we know which directory needs the additional permission.


Thanks, Arun

Share Internet Through Wifi On Windows 7, Share Internet connection with multiple system

Share Internet Through Wifi On Windows 7, Share Internet connection with multiple system

Maryfi is basically a small software which has been specially developed for Windows 7 users and it allows the users to easily create Wifi hotspots which can be used to share the internet connection on more than 1 laptops. Along with it they can also be used for connecting mobile phones, gaming consoles or other laptops accessories. So, by using this utility one can make use of different devices which requires internet connection for their working and thus may prove to be a real help.

image

Now, in order to use this small and smart utility, you have to first download it from the below given link and then you have to install this free tool on your computer. After launching the app, you need to select the name and password of the connection you wish to create.

So, just download it from the below given link and try it out. Maryfi is compatible with only Windows 7 and it is available as a complete freeware.

Download Maryfi.

Fix a Slow Internet Connection, Why is my Internet connection so slow?

Fix a Slow Internet Connection, Why is my Internet connection so slow?,

solved - I am experiencing slow Internet connectivity on my data card, Fix a Slow Internet Connection, Why is my Internet connection so slow?

Solution:
Following tips will come in handy if you are experiencing a slow Internet connection
1.
Delete temporary Internet files
Open Internet Explorer->Tools->Internet Options->Delete Files->Delete all offline contents->Click on OK button.
2.
Disable the firewall of operating system.(if anti virus is installed)
Control Panel->windows security center->windows firewall->"off"
3.
Check signal strength of phone .A poor signal may lead to poor speed.
4.
Check for virus, spyware and any other malicious programs on your desktop/laptop.
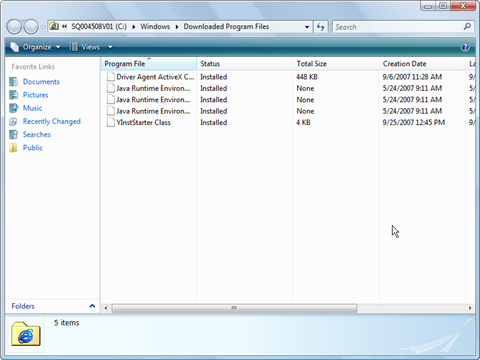
5.

Reinstall the phone's modem driver.


Check your internet speed

You can check your internet connection by hover your mouse pointer over the internet connection icon in the bottom right hand corner of your screen. A pop up window will display your internet connection. You can also click the icon to launch the Properties window.

check settings to determine the cause of slow internet connection


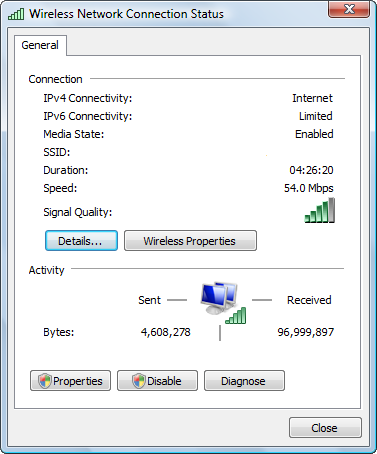
The graphic shows a connection that is using a wireless router so in addition to your internet speed, log on duration and status, you will also see the signal strength. You can get more accurate test by using online broad band test sites. If you are getting 80% of your ISP advertised speed, You are in good shape. There is usually a standard loss of 10-20% speed due to line quality. So if your are supposed be getting 1.5mbs and your internet speed runs around 1.25mbs, you have a good connection.

4 Steps to Speed A Slow Internet Connection.


STEP 1: REDUCE THE WEB CACHE

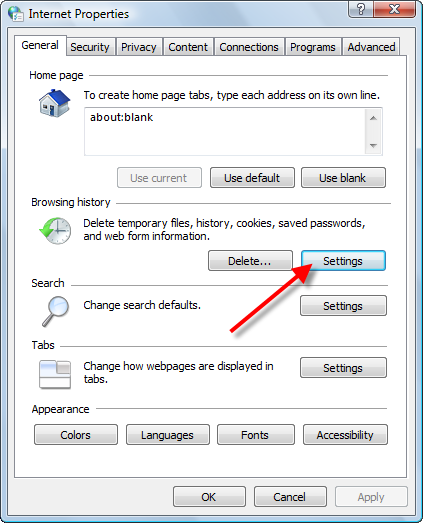
First step in speeding up your slow internet connection to tweak your internet options. To launch the internet options utility follow the the direction below:
1.Click Start
2. Click Control Panel
3. Double Click Internet Options
4. Click Settings under Browsing History

tweak the browser settings for a faster connection


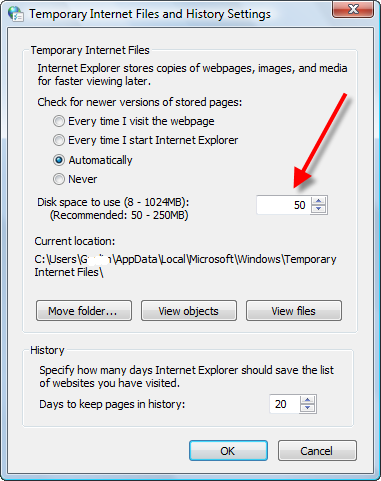
The task here is to make your web cache as small as possible. The less disk space your reserve for your temporary files is less data that your computer needs to search through. This action can easily award you a faster connection on the net.
5. Reduce the Disk Space to Use to the minimum recommended amount or as low as your desire.

reduce disk space to speed up a slow internet connection


STEP 2: CLEAR TEMP FILES

Deleting your web cache is a good way to speed up a slow internet connection. These files take up valuable resources that could be used to for a better net surfing experience. Remember that while you are online many files in the web cache are active. Cookies are loaded in your browsers and constantly update themselves. Also your computer will search through the temp files to match the latest version of a web page. So, by clearing the web cache you cut down on the work your PC needs to do thus speeding up your slow internet connection. Remember to shutdown the browser when deleting the cache. Because what files are open will not be deleted. Here how to delete your temporary internet files.

Manual steps to erase your temporary internet files.

1. Quit Internet Explorer, Firefox, or any other web browser
2. Click Start, click Control Panel, and then double-click Internet Options.
3. On the General tab, click Delete Files under Temporary Internet Files.
4. In the Delete Files dialog box, click to select the Delete all offline content check box , and then click OK.
5. Click OK.

If you prefer not to delete all the files you can selective search each category and delete. The temporary files are broken up into six categories. To view your internet files follow the steps below:
In Internet Explorer

1. Open Internet Explorer.
2. Choose Internet Options from the Tools menu.
3. Click the General, Under Temporary Internet Files, Click Settings.
4.Click View Files
5. Delete selected files

The goal here is to cut down on the files your computer needs to search through. Alternate methods can be used to clear the web cache and other unnecessary data. Check out Clean Up A Slow Computer for more tips.


STEP 3: SPEED UP WEB PAGES

One of the biggest culprit of slow internet connections. Is your web browser's settings. When you log on to a web page, your computer is assaulted with data it needs to organize and present in an orderly manner. This information takes time to load. So, the more information the longer it takes to load. However you tweak a number of settings to decrease the time it takes to load a web page. By reducing the amount of animation and scripts. You can see drastic increases in your internet surfing.
1.Click Start
2. Click Control Panel
3. Double Click Internet Options
4. Click Settings
5. Scroll down to Multimedia.
6. You can reduce the options in order to increase speed at which web pages are loaded.


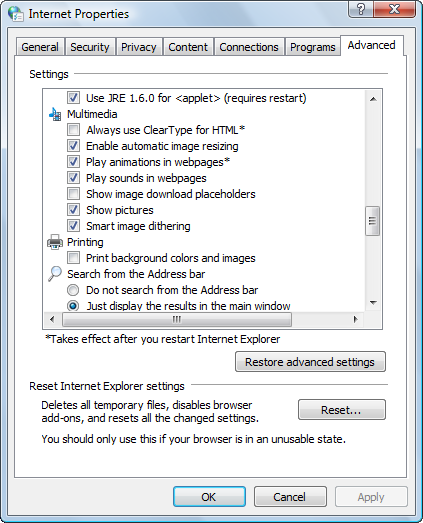
By restricting your browser to display only text is the fastest option.

STEP 4: CONTROL YOUR ANTIVIRUS

A slow internet connection is often a software related problem and not the fault of your ISP. Buying more bandwidth is always going to help. Slow down is a normal result of having security software like an anitvirus on your computer. The software must constantly update it files and signatures. All this information is logged in your computer. The majority of the information is placed in your registry.

When your antivirus performs a scan. It produces a log. This log can be up to 100 megabytes of information each. The registry holds all this info. The addition of the info is not the major problem. Its that the information is placed in many places in your registry. This causes fragmentation of files. Your computer's operating system must search through the massive files in the registry constantly. If the registry is error-filled, fragmented, or bloated with unnecessary and duplicate files, you will have major slowdown. Organize and keep it maintained, the problem will most likely be solved. You can scan to see the condition of your registry and see what resources you can unlock resources.Click Here to SCAN your registry

Also you should try to see what processes are loaded when your computer starts. Often the antivirus will check your email, scan, and even update at the same time. This may be occurring everytime you start up your PC. These acts can last as long as 3 hours. They may be running silently in the background without your knowledge. Maintain them by following the directions below or by tweaking the settings in your antivirus:

1. Open your Start menu.
2. Click Run
3. In the command screen type msconfig.exe
4. In the system configuration utility,click either service or startup
tab5. Uncheck all programs that you dont want to load win the antivirus is starting
6. Click OK


TIPS FOR FIREFOX BROWSER

The browser is configured to load one web page or "request" a time. You can alter these settings to increase the amount of information that can flow into Firefox's pipeline.

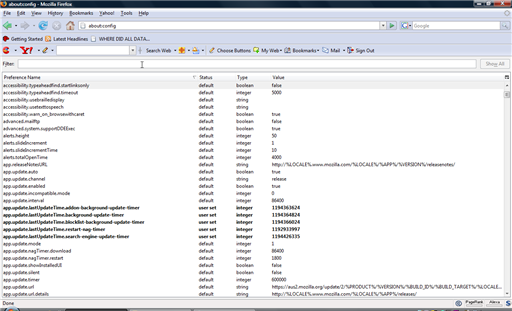
1.Type “about:config” into the address bar and hit return. Scroll down and look for the following entries:

network.http.pipelining network.http.proxy.pipelining network.http.pipelining.maxrequests

2. Alter the entries as follows:

Set “network.http.pipelining” to “true”

Set “network.http.proxy.pipelining” to “true”

Set “network.http.pipelining.maxrequests” to some number like 30. This means it will make 30 requests at once.

3. Finally, right-click the black space and select "New" and choose Integer. Name it “nglayout.initialpaint.delay” and set its value to “0″. This value is the amount of time the browser waits before it acts on information it receives.

use firefox to speed up a slow internet connection


Solved - Unable to connect Reliance Netconnect Broadband + in Windows 7, error - A Connection to the remote computer could not be established.

Solved - Unable to connect Reliance Netconnect Broadband + in Windows 7, error - A Connection to the remote computer could not be established. You might need to change the network settings, reboot require to re-connect netconnect,Solved - Unable to connect Reliance Netconnect Broadband + in Windows 7, error - A Connection to the remote computer could not be established. You might need to change the network settings, reboot require to re-connect netconnect,

" A Connection to the remote computer could not be established. You might need to change the network settings."

I have re-installed this application almost 10 times, and also pass modem query but still it's not getting connected,

Solution : -

Task1:
a) Go to User Account Control Settings. Type in UAC, or go to the System and Security applet. Click on the "Change User Account Control Settings" link.
b) BTW, you can also type in this command from the Run menu: C:\Windows\System32\UserAccountControlSettings.exe
To turn off UAC, move the slider to the Never notify position, and then click OK. If you're prompted for an administrator password or confirmation, type the password or provide confirmation.

Task 2)

1) In WIN7, goto Start > Control Panel
2) Click on the 'Trouble Shooting' option on the Control Panel
3) On the Trouble Shooting Computer Problems window, click on 'Configure a Device' option under 'Hardware and Sound'
4) Hardware and Devices dialog appeared. I clicked on Next button
5) On the next page, a message appeared that my WIN7 is not configured (may be for security reasons) to download drivers automatically and install. Rather it was configured not to install and driver!
6) I selected the option of automatically downloading the driver and and applied the change.
7) Rebooted my machine
8) Inseted the USM Modem of Reliance Netconnect BB+. On the lower right panel, a pop up appeared displaying 'Installing Drivers....'
9) I installed the software from the data card and then invoked the Reliance Netconnect window.
10) Now I could see the singal on the window and was able to connect.

I hope that this procedure should work guys having problem using NetConnect with WIN7 prof.

Arun

Resolved - windows 7 stuck on shutting down screen, Windows 7 hangs on 'shutting down' screen, shutdown issue, windows cant shut down

Resolved - windows 7 stuck on shutting down screen, Windows 7 hangs on 'shutting down' screen, shutdown issue, windows cant shut down

program and/or process can be from malware or can be legitimate (such as an invasive antivirus like Norton or McAfee). If you are using a Norton or McAfee product, uninstall it and replace with a better program such as NOD32, Kasperksy, or Avast (free). The Windows Firewall is adequate for most people. Shutdown issues can also be caused by old/poorly written drivers so make sure all drivers are updated, particularly on Windows Vista and Windows 7.

A. The first step is always to make sure your computer is virus/malware free.

B. If the computer is virus/malware-free, drivers are current, and no Norton or McAfee programs are installed, then do clean-boot troubleshooting to see which program/process is the culprit:

How to perform a clean boot in Vista and XP - http://support.microsoft.com/kb/331796
How to perform a clean boot in Windows Vista or Windows 7 - http://support.microsoft.com/kb/929135

Step 1: Perform a clean boot

NoteIf the computer is connected to a network, network policy settings may prevent you from following these steps. We strongly recommend that you do not use the System Configuration utility to modify the advanced boot options on the computer unless a Microsoft support engineer directs you to do this. Doing this may make the computer unusable.

  1. Log on to the computer by using an account that has administrator rights.
  2. Click Start
    Collapse this imageExpand this image

     Start button

    , type msconfig.exe in the Start Search box, and then press ENTER to start the System Configuration utility.

    Collapse this imageExpand this image

    User Account Control permission

    If you are prompted for an administrator password or for confirmation, type your password, or click Continue.

    Collapse this imageExpand this image

  3. On the General tab, click to select the option Selective startup, and then click to clear the option Load startup items check box. (The Use Original Boot.inicheck box is unavailable.)
    Collapse this imageExpand this image
    Click to expand this image
  4. On the Services tab, click to select the Hide all Microsoft services check box, and then click Disable all.
    Collapse this imageExpand this image
    Click to expand this image

    Note Following this step lets Microsoft services continue to run. These services include Networking, Plug and Play, Event Logging, Error Reporting, and other services. If you disable these services, you may permanently delete all restore points. Do not do this if you want to use the System Restore utility together with existing restore points.

  5. Click OK, and then click Restart.

Tuesday 2 August 2011

MagicHow: mukesh ambani house,mukesh ambani house pictures,m...

MagicHow: mukesh ambani house,mukesh ambani house pictures,m...: "mukesh ambani house,mukesh ambani house pictures,mukesh ambani house video, mukesh ambani house,mukesh ambani house pictures,mukesh amban..."

MagicHow: Rakhi 2011 Date,Rakhi 2011,Raksha Bandhan 2011 Dat...

MagicHow: Rakhi 2011 Date,Rakhi 2011,Raksha Bandhan 2011 Dat...: "Rakhi 2011 Date,Rakhi 2011,Raksha Bandhan 2011 Date,Raksha Bandhan 2011,Raksha Bandhan 2011 Celebration, check online now, Raksha Bandhan 20..."

MagicHow: Nag Panchami 2011,Nag Panchami SMS,Nag Panchami Pi...

MagicHow: Nag Panchami 2011,Nag Panchami SMS,Nag Panchami Pi...: "Nag Panchami 2011,Nag Panchami SMS,Nag Panchami Pictures,Nag Panchami Greetings,Nag Panchami Scraps,Nag Panchami 2011,Nag Panchami SMS,Nag P..."